Pattern status (delete this box after testing): These instructions were reviewed for stitch-count consistency but have not been test-crocheted yet. Make one of each flower, correct anything that doesn’t work, then delete this box before you publish.
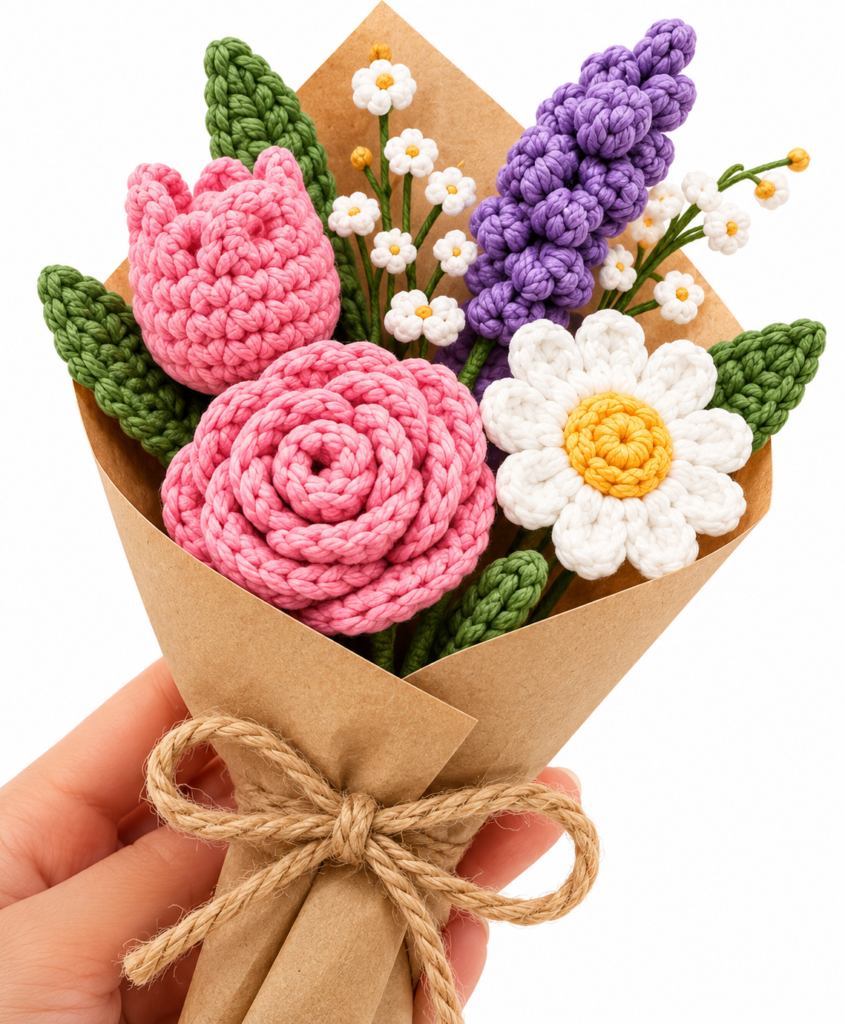
A crochet mini bouquet is one of the most satisfying small projects you can make: each flower works up quickly, uses tiny amounts of yarn, and the finished bunch never wilts. This pattern walks you through a rolled rose, a rounded tulip, a white daisy, a sprig of lavender, and little puffs of baby’s breath, then shows you how to add leaves, make stems, and wrap everything in kraft paper.
Every flower uses basic stitches, so it’s a friendly project for advanced beginners. It’s also a lovely way to use up cotton scraps, and the finished bouquet makes a thoughtful handmade gift for birthdays, Mother’s Day, teachers, or anyone who could use a bloom that lasts.
Project Overview
- Skill level: Easy (advanced beginner)
- Finished size: about 4 to 4¾ in (10 to 12 cm) tall, depending on stems and wrapping
- Time: roughly one afternoon for the full bouquet; most single flowers take well under an hour
- Terms: US crochet terms
- Skills used: magic ring, chain, slip stitch, single crochet, half double crochet, double crochet, treble crochet, increasing, decreasing, and simple sewing
You’ll make: 1 rose, 1 tulip, 1 daisy, 1 lavender sprig, 3 to 5 baby’s breath puffs, and 3 or 4 leaves. Make extra flowers for a fuller bouquet.
Materials
- Sport weight (#2) cotton yarn in pink, white, yellow, purple, and green. Small amounts or scraps are enough.
- 2.0 to 2.5 mm crochet hook (2.25 mm is US B-1)
- Stitch marker
- Yarn needle
- Scissors
- A small amount of fiberfill stuffing for the tulip
- Thin floral wire, 18 to 22 gauge, or green chenille stems (optional, for stems)
- Green floral tape, or extra green yarn to wrap the stems
- Wire cutters, if you use floral wire
- Kraft paper or other wrapping paper, about 8 x 8 in (20 x 20 cm)
- Jute twine or ribbon
- Hot glue gun or craft glue (optional)
Choosing Your Yarn and Hook
Cotton is the best choice for small crochet flowers. It shows stitch definition clearly, holds its shape, and doesn’t get fuzzy. A smooth sport weight cotton is ideal.
You’ll notice the hook is smaller than the one most sport weight yarn labels suggest. That’s on purpose: a tighter fabric keeps the petals firm and stops stuffing from showing through the tulip. If your stitches feel too stiff to work comfortably, go up half a millimeter.
Want a bigger bouquet? Use the same instructions with worsted weight cotton and a 3.5 to 4 mm hook. Every flower will scale up evenly.
Abbreviations (US Terms)
| Abbreviation | Meaning |
|---|---|
| MR | magic ring (adjustable ring) |
| ch | chain |
| sl st | slip stitch |
| sc | single crochet |
| hdc | half double crochet |
| dc | double crochet |
| tr | treble crochet |
| inc | increase: 2 sc in the same stitch |
| dec | decrease: invisible single crochet decrease (sc2tog through front loops only) |
| st(s) | stitch(es) |
| Rnd | round |
| rep | repeat |
| FO | fasten off |
Pattern Notes
- Numbers in parentheses at the end of a round or row, such as (12), give the total stitch count.
- The tulip is worked in a continuous spiral. Don’t join rounds; move your stitch marker up to the first stitch of each new round.
- Instructions inside parentheses followed by “x6” are repeated six times across the round.
- Leave long yarn tails where noted. You’ll use them to sew pieces together.
How to Crochet the Flowers
Make all the flowers and leaves first, then add stems and assemble the bouquet. Weave in any tails you won’t use for sewing as you finish each piece.
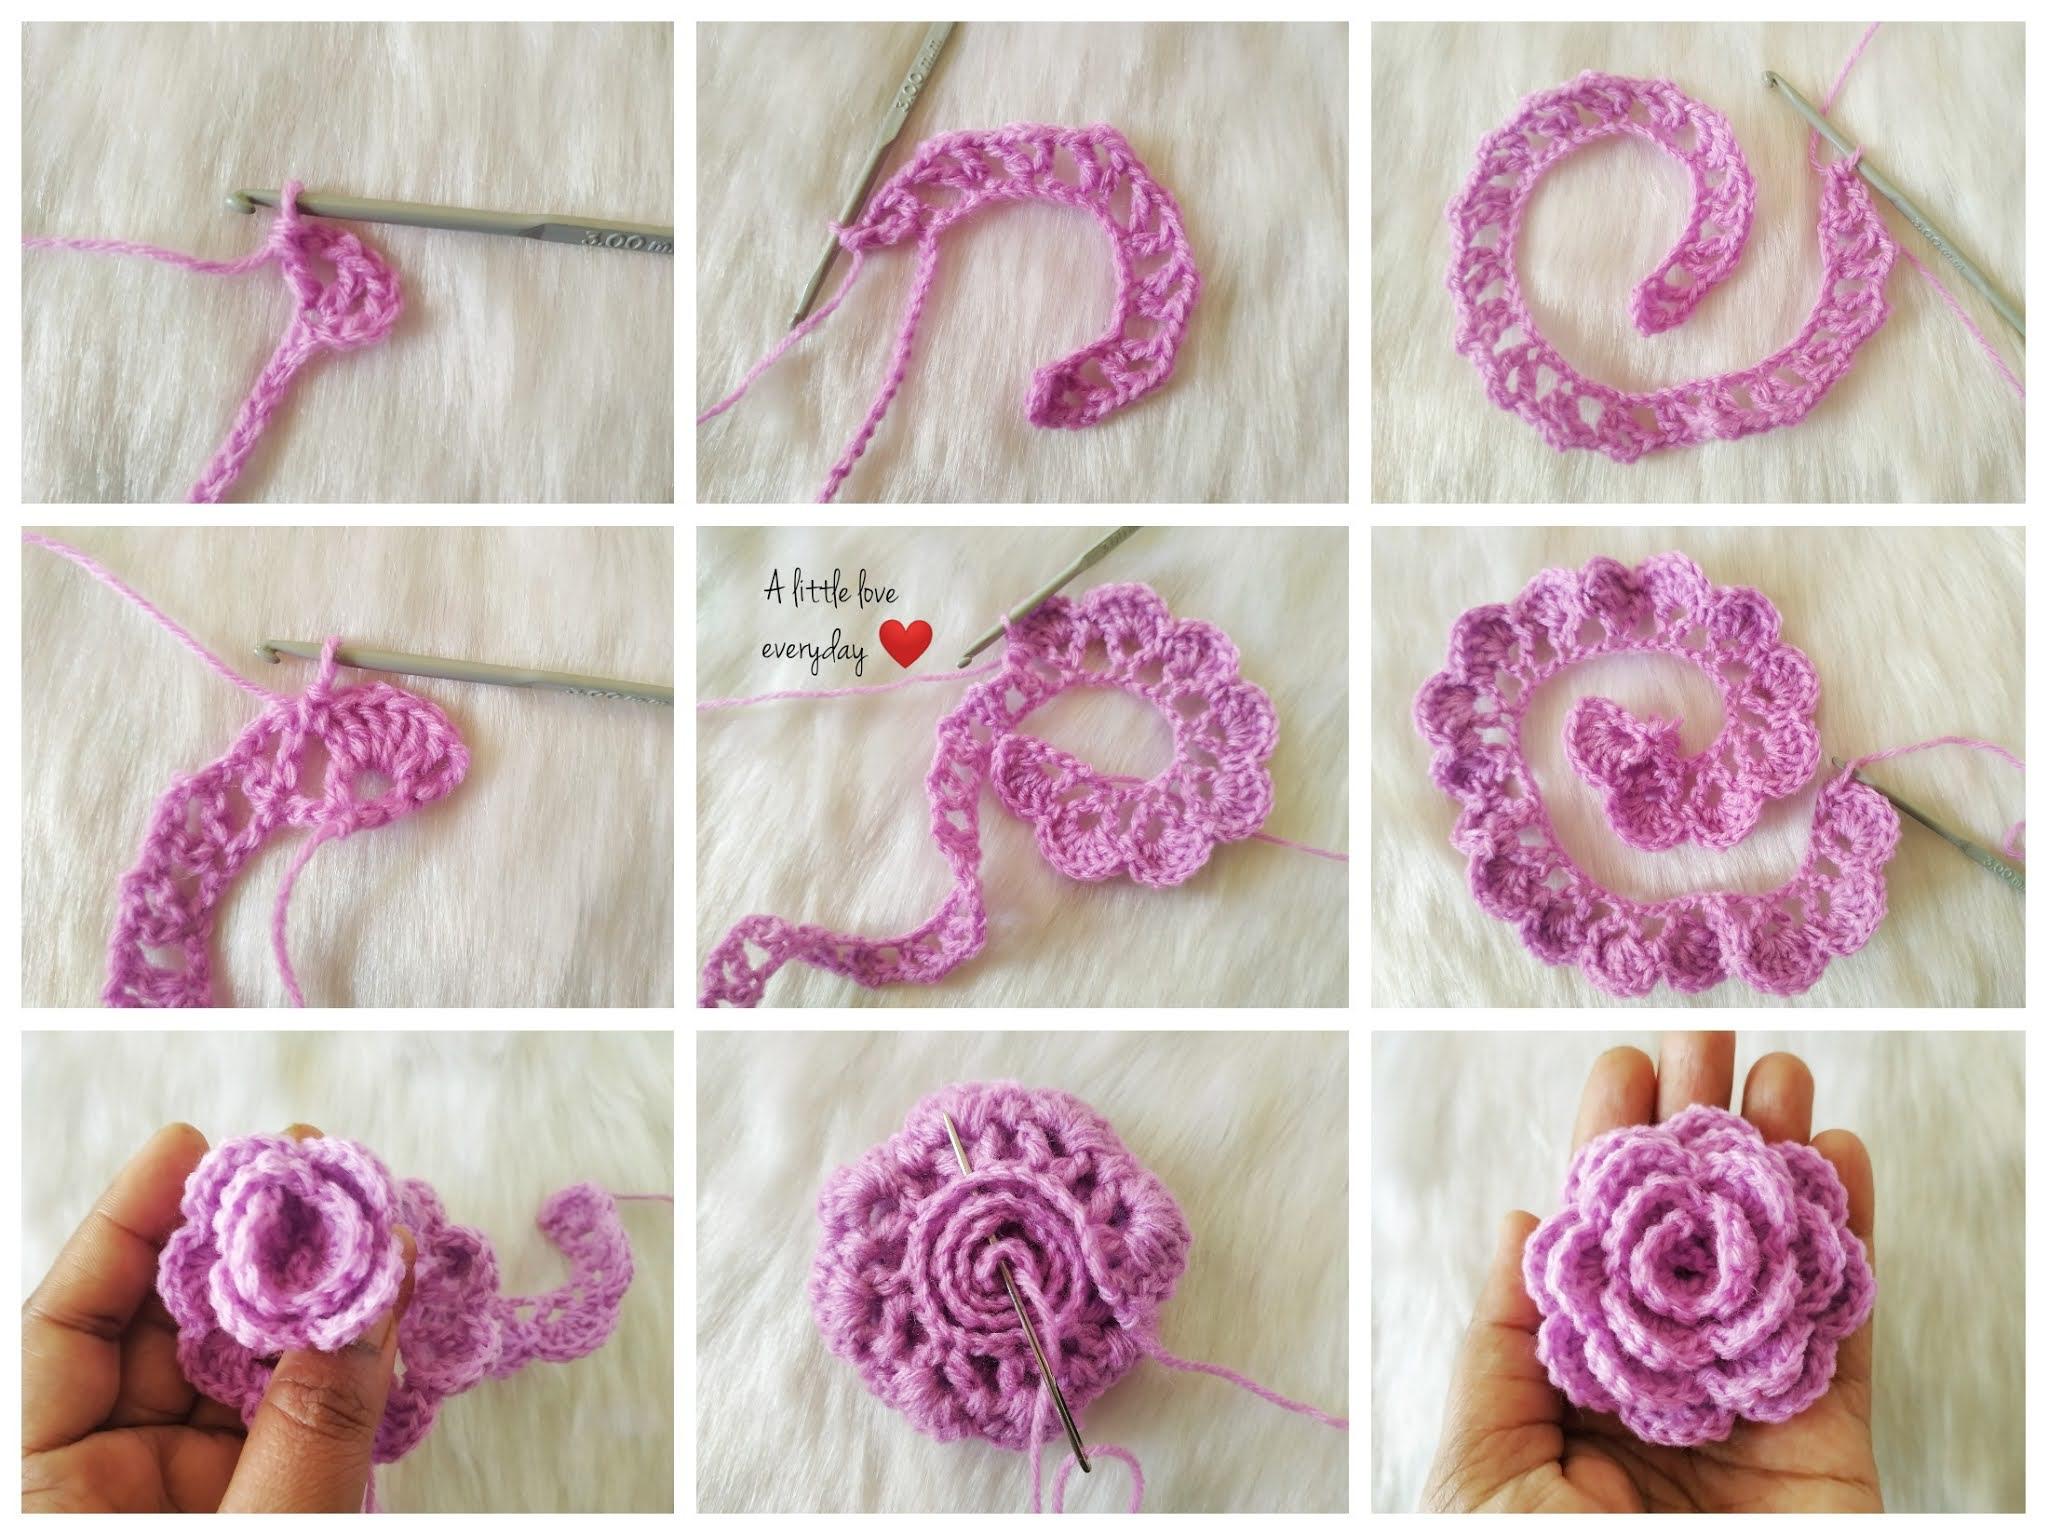
How to Crochet a Rose
This rose is a simple strip of single crochet rolled into a spiral. It’s the quickest flower in the bouquet.
Yarn: pink
- Foundation: Ch 21.
- Row 1: Sc in the 2nd ch from the hook and in each ch across. (20) FO, leaving a 10 in (25 cm) tail.
- Hold the strip with the tail at the far end. Starting from the end without the tail, roll the strip tightly for the first two or three turns to form the center.
- Keep rolling, letting the strip sit a little looser and slightly lower with each turn so the outer “petals” open up.
- Thread the tail onto your yarn needle. Pass it back and forth through all the layers at the base of the rose four or five times to lock the spiral in place.
- Leave the remaining tail. You’ll use it to attach the rose to its stem.
How to Crochet a Tulip
The tulip is worked in the round from the bottom up, lightly stuffed, then shaped with a few stitches to suggest three petals.
Yarn: any tulip color (pink is shown)
- Rnd 1: 6 sc in MR. (6)
- Rnd 2: Inc in each st around. (12)
- Rnd 3: (Sc in next st, inc) x6. (18)
- Rnds 4–5: Sc in each st around. (18)
- Rnd 6: (Sc in next st, dec) x6. (12)
- Stuff lightly. Use just enough fiberfill to round out the shape.
- Rnd 7: Dec around. (6) FO, leaving a 10 in (25 cm) tail.
- Thread the tail onto your needle and weave it through the front loops of the last 6 stitches. Pull gently to close the opening.
- To shape the petals, insert the needle at the top center and bring it out about halfway down the side. Go back in at the top center and pull snugly to make a shallow ridge.
- Repeat step 2 twice more, spacing the ridges evenly around the tulip, to make three petal sections.
- Secure the tail at the top and hide the end inside the flower. The magic ring at the bottom is where the stem will go in.
How to Crochet a Daisy
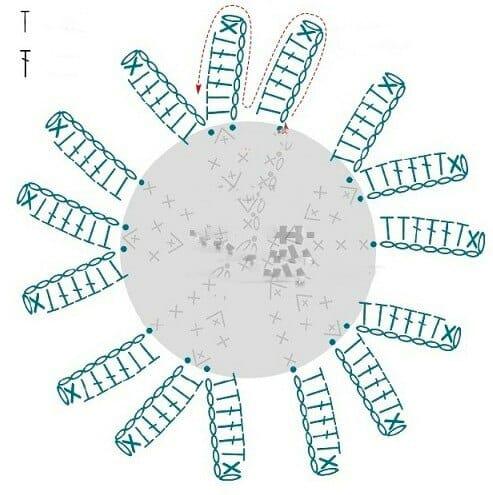
The daisy has a yellow center and twelve white petals worked directly into it.
Center (yellow):
- Rnd 1: 6 sc in MR. Join with a sl st to the first sc. (6)
- Rnd 2: Ch 1, inc in each st around. Join with a sl st to the first sc. (12) FO and weave in the end on the back.
Petals (white):
- Join: With white, join with a sl st in any stitch of Rnd 2.
- Petal: Ch 7. Working back along the chain: sl st in the 2nd ch from the hook, sc in the next ch, hdc in the next ch, dc in each of the next 2 ch, tr in the last ch. (6 sts on the petal) Sl st in the next stitch of the center.
- Repeat the petal 11 more times. (12 petals) Your last sl st lands in the stitch where you joined.
- Finish: FO, leaving an 8 in (20 cm) tail for attaching the stem. Weave in the yellow tail.
For shorter, rounder petals, ch 6 instead and work sl st, sc, hdc, dc, dc along the chain (5 sts).
How to Crochet Lavender
Lavender is a short strip wrapped around the top of a stem. An optional second row adds little bumps that look like buds.
Yarn: purple
- Foundation: Ch 16.
- Row 1: Hdc in the 2nd ch from the hook and in each ch across. (15)
- Optional Row 2 (buds): Ch 1, turn. *(Sl st, ch 3, sl st) in the next st, sl st in the next st.* Rep from * across, ending with (sl st, ch 3, sl st) in the last st. (8 picot buds)
- Finish: FO, leaving a 10 in (25 cm) tail.
- Lay the top of your stem along one end of the strip.
- Wind the strip around the stem in a tight spiral, moving slightly down the stem with each turn so the sprig is long and narrow.
- Stitch through the layers with the tail to hold the spiral, or add a few small dots of glue as you wind.
How to Crochet Baby’s Breath
These tiny white puffs fill the gaps between the larger flowers. Make three to five.
Yarn: white
- Rnd 1: 6 sc in MR. Pull the ring closed tightly, then join with a sl st to the first sc. (6)
- Finish: FO, leaving an 8 in (20 cm) tail.
- Thread the tail onto your needle and weave it around the outer edge of the circle.
- Pull gently so the circle cups into a small puff, then wrap the tail around the base once or twice and secure it.
- Use the remaining tail to attach the puff to a thin stem.
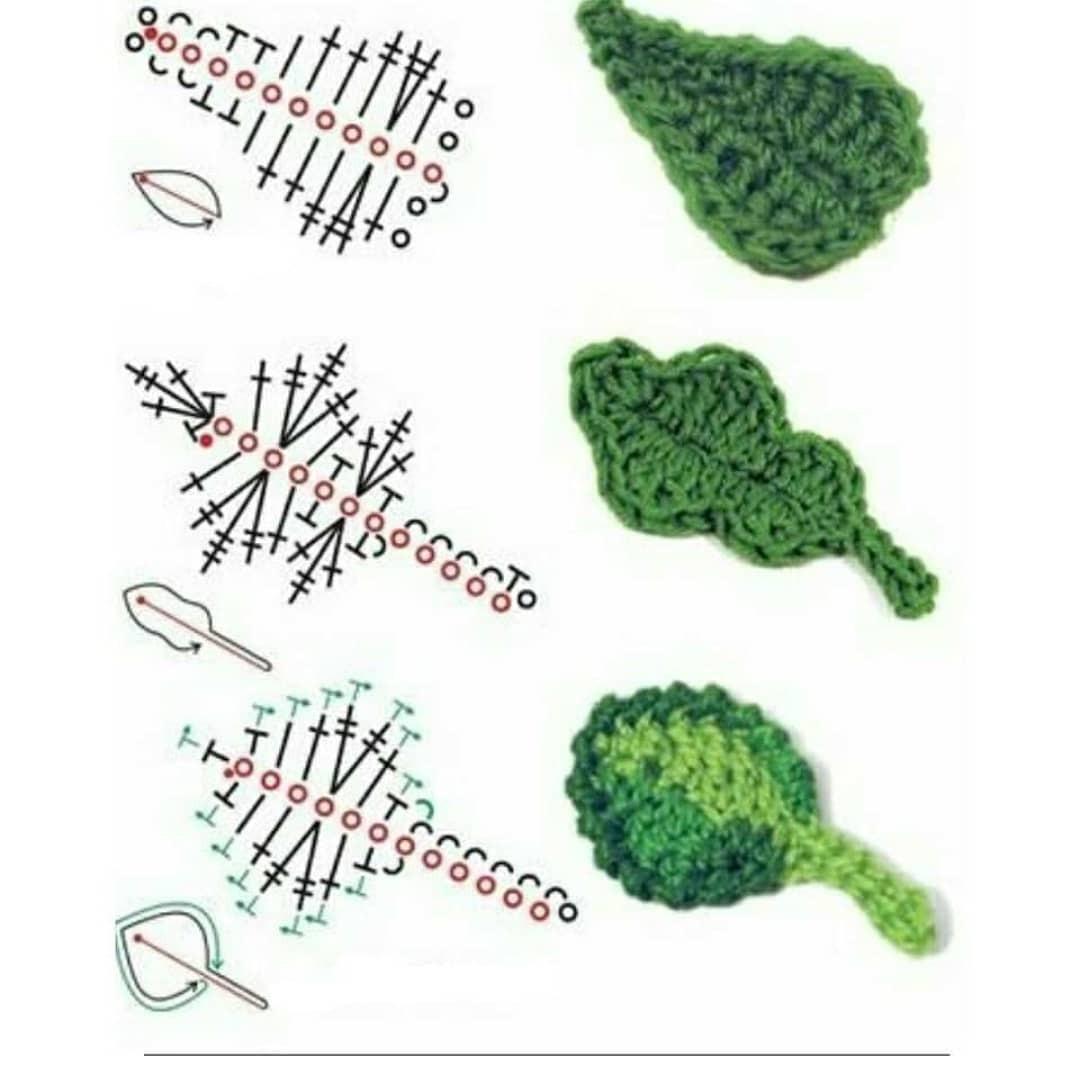
How to Crochet Leaves
The leaf is worked around both sides of a short chain, which gives it a full oval shape and a pointed tip. Make three or four, and vary their sizes if you like.
Yarn: green
- Foundation: Ch 8.
- Side 1: Working along the chain, starting in the 2nd ch from the hook: sc, hdc, dc, dc, hdc, sc. (6 sts)
- Base: 3 sc in the last ch.
- Side 2: Rotate your work and continue along the other side of the foundation chain: sc, hdc, dc, dc, hdc, sc. (6 sts)
- Tip: Sl st in the first skipped ch. (15 sts plus the sl st at the tip) FO, leaving an 8 in (20 cm) tail.
For a smaller leaf, ch 6 and work sc, hdc, dc, sc on each side with 3 sc at the base. For a larger leaf, add extra dc in the middle of each side.
How to Make the Stems Safely
Stems give the bouquet height and let you arrange each flower. You have three easy options.
- Floral wire and tape: Cut a piece of 18 to 22 gauge floral wire about 5 in (13 cm) long for each flower. Wrap it from top to bottom with green floral tape, stretching the tape slightly as you go so it sticks to itself.
- Yarn-wrapped wire: Put a dot of glue at the top of the wire and wind green yarn snugly down its length. Finish with another dot of glue.
- Chenille stems: Green chenille stems (pipe cleaners) are soft, bendable, and need no wrapping.
Attaching flowers and leaves
- Push the top of the stem into the base of the flower. For the tulip, slide it into the magic ring at the bottom.
- Use the flower’s long tail to sew through the base and around the stem a few times, then tie off and hide the end. Add a small dot of glue for extra hold if you like.
- Attach leaves partway down a stem with their tails, or tape them in place as you wrap the stem.
Safety first: Cut wire ends are sharp. Bend the bottom of each wire into a small loop or cover it with tape. Hot glue can burn, so keep a bowl of cool water nearby and work carefully. Because of the wire, glue, and small parts, this bouquet is a decoration, not a toy, so keep it away from babies, young children, and pets.
How to Assemble and Wrap the Bouquet
- Arrange the flowers. Hold the rose and tulip in the center, add the daisy and lavender around them, and tuck the baby’s breath into the gaps. Let the lavender stand slightly taller than the rest.
- Add the leaves. Position leaves around the outside so they frame the flowers.
- Secure the stems. Wrap floral tape around all the stems just below the flower heads, then once more about an inch lower.
- Wrap in paper. Fold your kraft paper square into a cone, wrapping it around the stems so the paper opens out around the flowers. Fold under any sharp corners.
- Tie it off. Wrap jute twine or ribbon around the narrowest part of the cone two or three times and tie a bow.
- Add a gift tag if you’re giving it away.
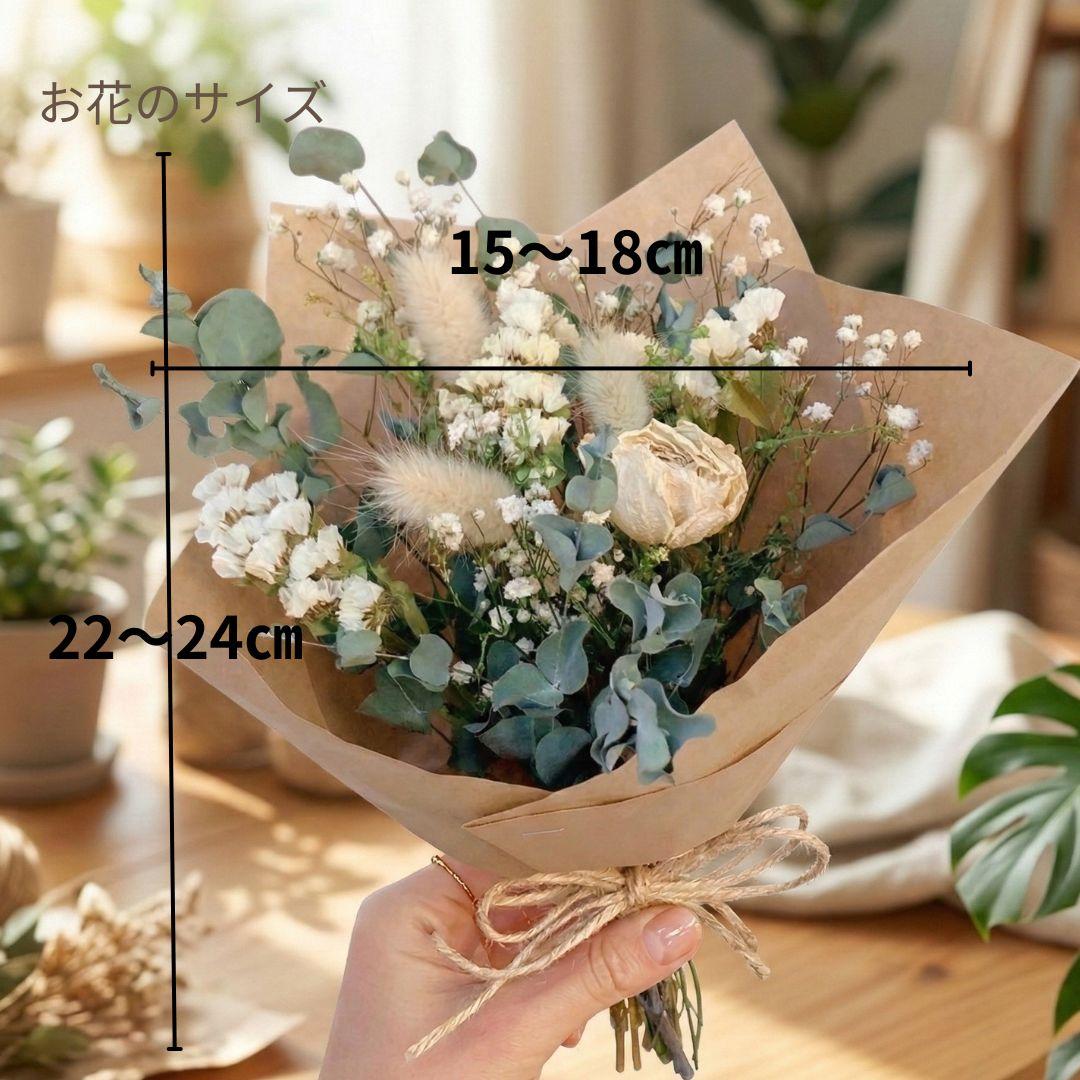
The finished bouquet is about 4 to 4¾ in (10 to 12 cm) tall. Longer stems or a taller paper cone will make it bigger.
Tips and Troubleshooting
- Magic ring keeps loosening? After you pull it closed, weave the starting tail back through a few stitches in the opposite direction before trimming.
- Rose looks like a flat coil? Roll the first turns more tightly and let each outer turn sit a little lower than the one before it.
- Tulip looks lumpy? Use less stuffing. It should feel soft, not firm.
- Holes when decreasing? Use the invisible decrease: insert your hook through the front loops only of the next two stitches, then complete a single crochet.
- Daisy petals curling? Pin the daisy flat, mist it lightly with water, and let it dry.
- Stems flopping? Switch to a thicker wire (a lower gauge number) or twist two thin wires together.
- Want variety? Change flower colors, make two of your favorite flower, or make single blooms on short stems to use as keychains.
Frequently Asked Questions
Is this crochet bouquet good for beginners?
Yes, if you’re comfortable with basic stitches. The rose, baby’s breath, and leaves are the easiest place to start. The tulip uses a magic ring and decreases, which are good skills to practice next.
What’s the best yarn for crochet flowers?
Smooth cotton or cotton-blend yarn gives crisp stitches and holds its shape well. Acrylic works too, but it’s softer and slightly fuzzier, so petals won’t look as defined.
Can I make the bouquet without wire?
Yes. Use chenille stems, or crochet a stem by chaining the length you need and working a slip stitch back along the chain. Crocheted stems are floppy, so the bouquet will be looser.
How do I make a bigger bouquet?
Make more flowers, use longer stems, or switch to worsted weight yarn with a 3.5 to 4 mm hook. Every piece will grow in proportion.
How should I clean a crochet bouquet?
Dust it gently or spot clean it with a damp cloth. Don’t soak it, because water can loosen glue and make wire rust.
Make It Your Own
Once you’ve made one crochet mini bouquet, it’s easy to make another in different colors for every season and occasion. Try an all-white bouquet for a wedding, bright tulips for spring, or a single rose for a quick thank-you gift.
Looking for your next project? Browse more crochet flowers and bouquets, find more easy crochet and handmade gift ideas, or brush up on the basics in our beginner crochet section.